Payments and Pupil Balances
Take a payment or a bundle up front, hold it as a credit balance and let lessons draw it down.
Payments and Pupil Balances in the app, step by step
Filmed in the live app, at your own pace. Use the player controls to pause, replay or go full screen.
Good to know
- The balance is per pupil, not per lesson. A pupil can hold a balance and owe nothing, or owe for lessons they have already had, at the same time.
- Outstanding on the balance card counts the lessons still unpaid at their own price, so it always agrees with the Payments row of your statistics.
- If a pupil buys a bundle, record the payment the day the money arrives rather than the day the lessons happen. The report then matches your bank statement.
- Gap-filling lessons are never charged to a balance automatically — only lessons you or your pupils book as normal lessons consume credit.
Not every pupil pays lesson by lesson. Many buy a block of five, settle a promotion or pay a lump sum to cover the next few weeks. The Payments tab is where that money lives: take the payment once, hold it as a balance, and let each lesson's cost be drawn from it — either automatically as lessons are created, or in one bulk action you choose when to run. Every application is recorded lesson by lesson, can be reversed if you make a mistake, and can be exported as a PDF.
-
Open the Payments tab
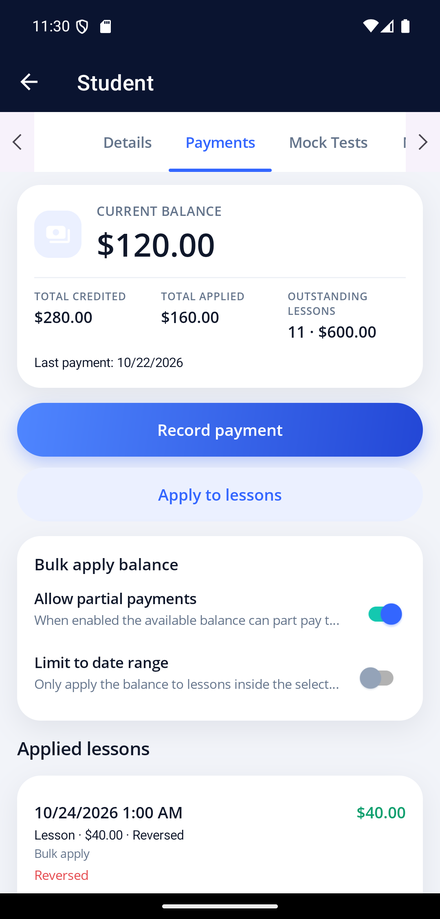
Open My Students, tap the pupil and choose Payments — it sits beside Details so it is always one tap away. The card at the top is that pupil's current balance, with the total credited, the total applied and what is still outstanding.
-
Take the payment
Tap Record payment, enter the amount, choose how the pupil paid and add a note such as Block of 5 lessons, then save. The money goes straight onto the pupil's balance and the payment appears in Payment history with its date, method and note. A refund works the same way: record it as a negative adjustment and the balance comes back down.
-
Apply the balance to lessons
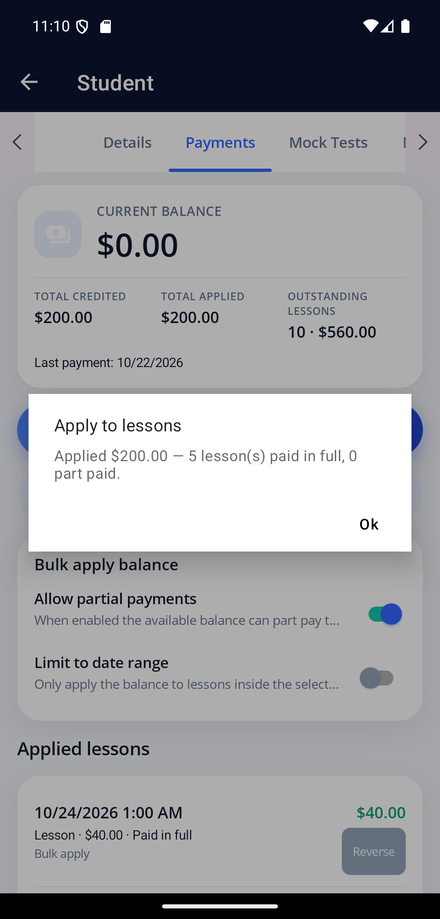
Tap Apply to lessons. Before anything changes, the app tells you exactly what it is about to do — for example Applied $200.00, 5 lesson(s) paid in full, 0 part paid. Confirm and every lesson the balance covers is marked paid and taken off the outstanding total. Use Allow partial payments when a balance only covers part of a lesson, or Limit to date range to settle everything up to a date and leave later lessons alone.
-
Let new lessons pay themselves
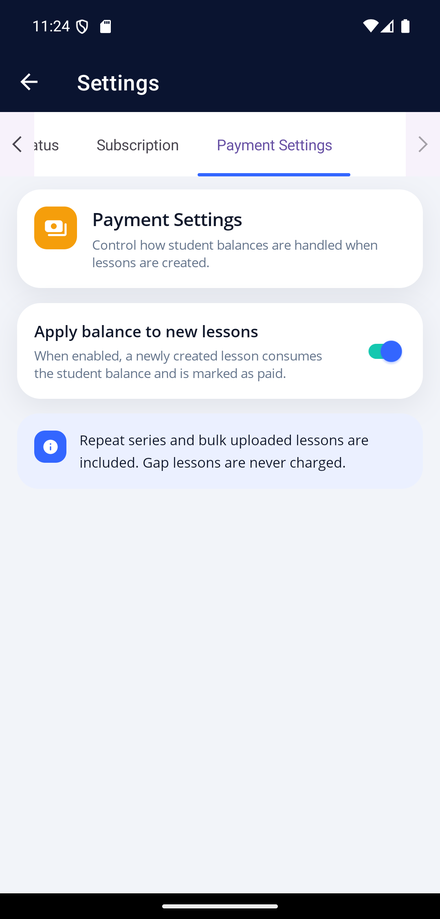
If you would rather not run the bulk action by hand, open Settings, then Payment Settings, and switch on Apply balance to new lessons. From then on a newly created lesson consumes the pupil's balance and is marked paid as it is saved, and repeat series are included. Gap lessons are never charged.
-
Check what was applied to which lesson
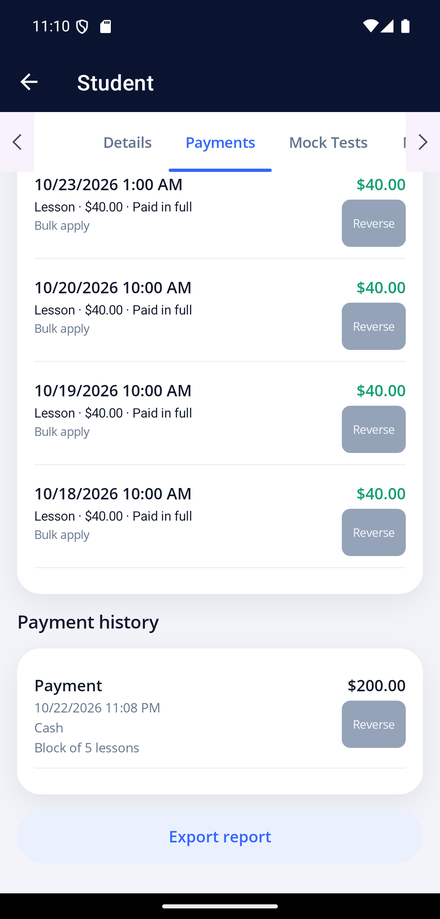
Applied lessons lists every lesson that has had money taken from the balance, with the amount, the date and how it was applied — Bulk apply or Auto apply. Payment history underneath shows the payments themselves.
-
Reverse a mistake
Each applied lesson has its own Reverse button. Reversing returns the money to the pupil's balance and marks the lesson unpaid again, and the reason for the reversal is recorded against it. This works for lessons paid automatically and manually alike, so a wrong amount or a lesson booked for the wrong pupil is never a problem.
-
Export the report
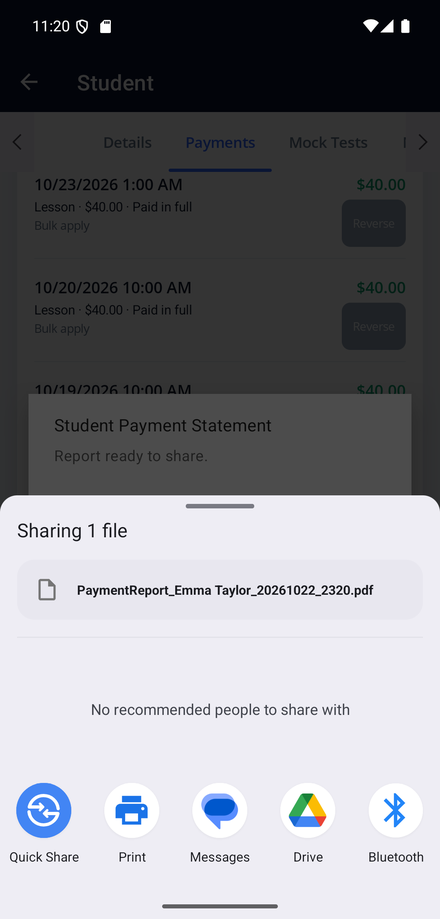
Tap Export report to produce a PDF listing every payment and the lessons it was applied to. The file opens in your phone's share sheet, so you can email it to the pupil or parent, save it to cloud storage, or print it for your records.